Upgrading the heating system to bioethanol or Diesel fuel

Mitsubishi i-MiEV Forum

Help Support Mitsubishi i-MiEV Forum:

This site may earn a commission from merchant affiliate links, including eBay, Amazon, and others.
Well, I've officially started my project.

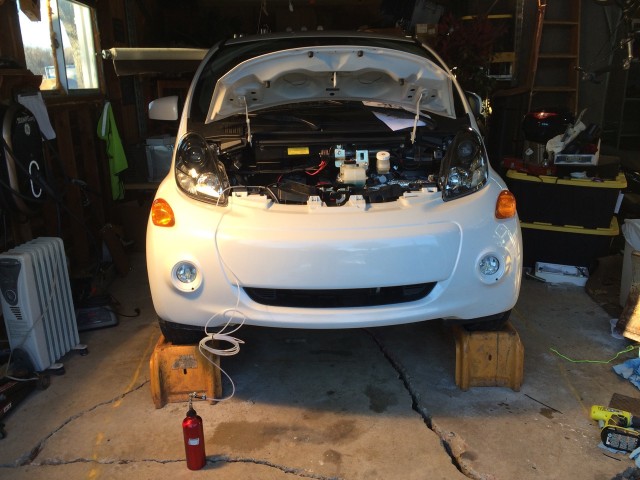
I decided to take the whole front bumper cover off. I already had to do that when I did the LED headlight upgrade, so at least I know the steps to do it.

IMG_7721-640x480.jpg


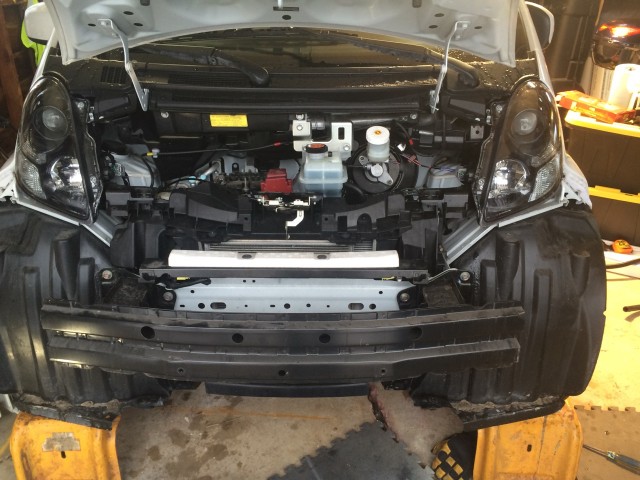
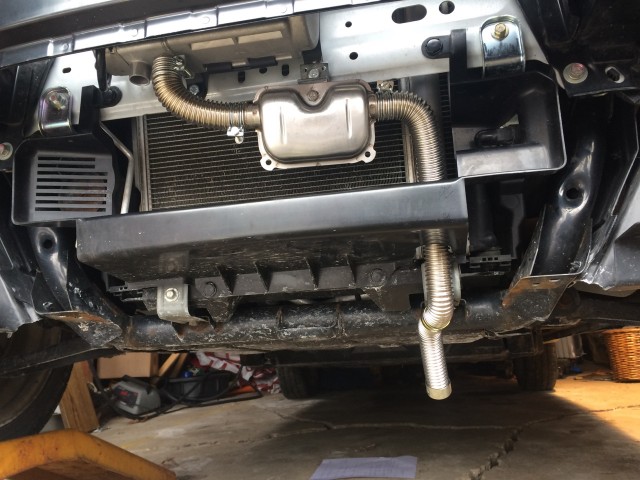
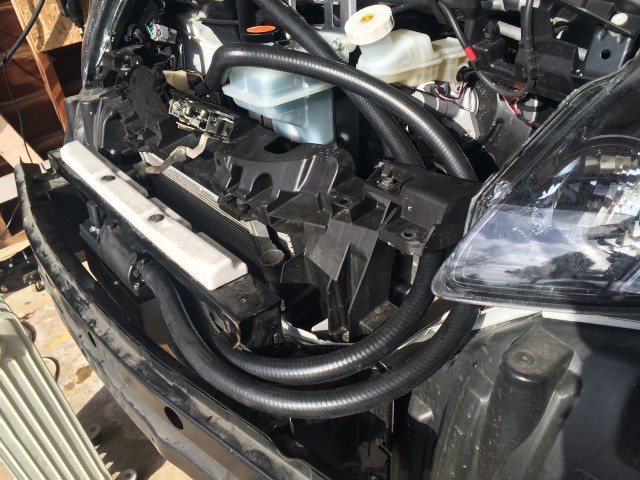
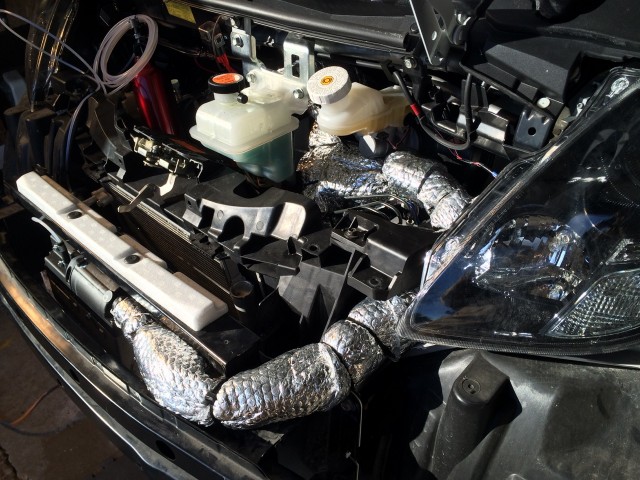
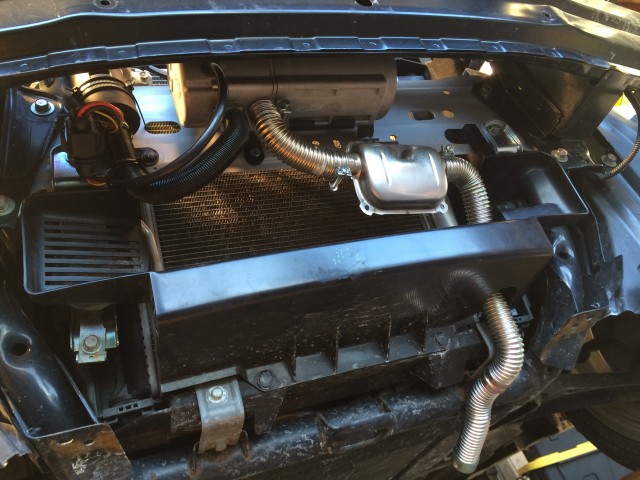
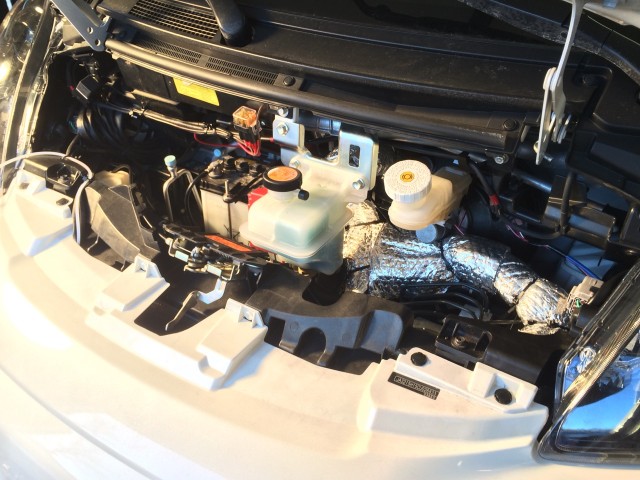
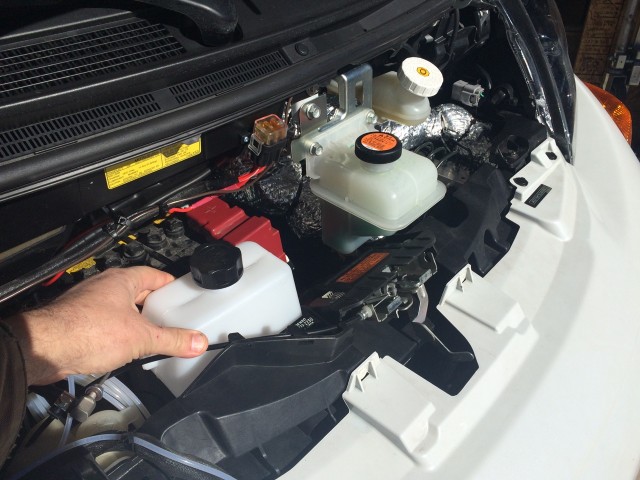
With the bumper cover out of the way, it's much easier to see what space we have to work with. Lots of room in there.

IMG_7722-640x480.jpg


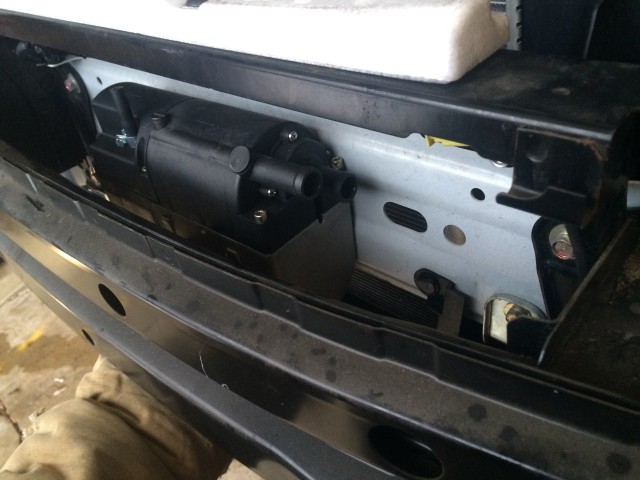
I shoved the heater up in place to to see how it would look. The space is perfect for it.

IMG_7725-640x480.jpg


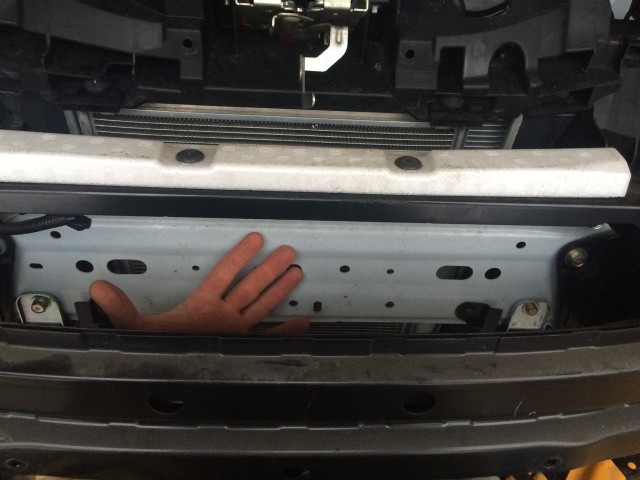
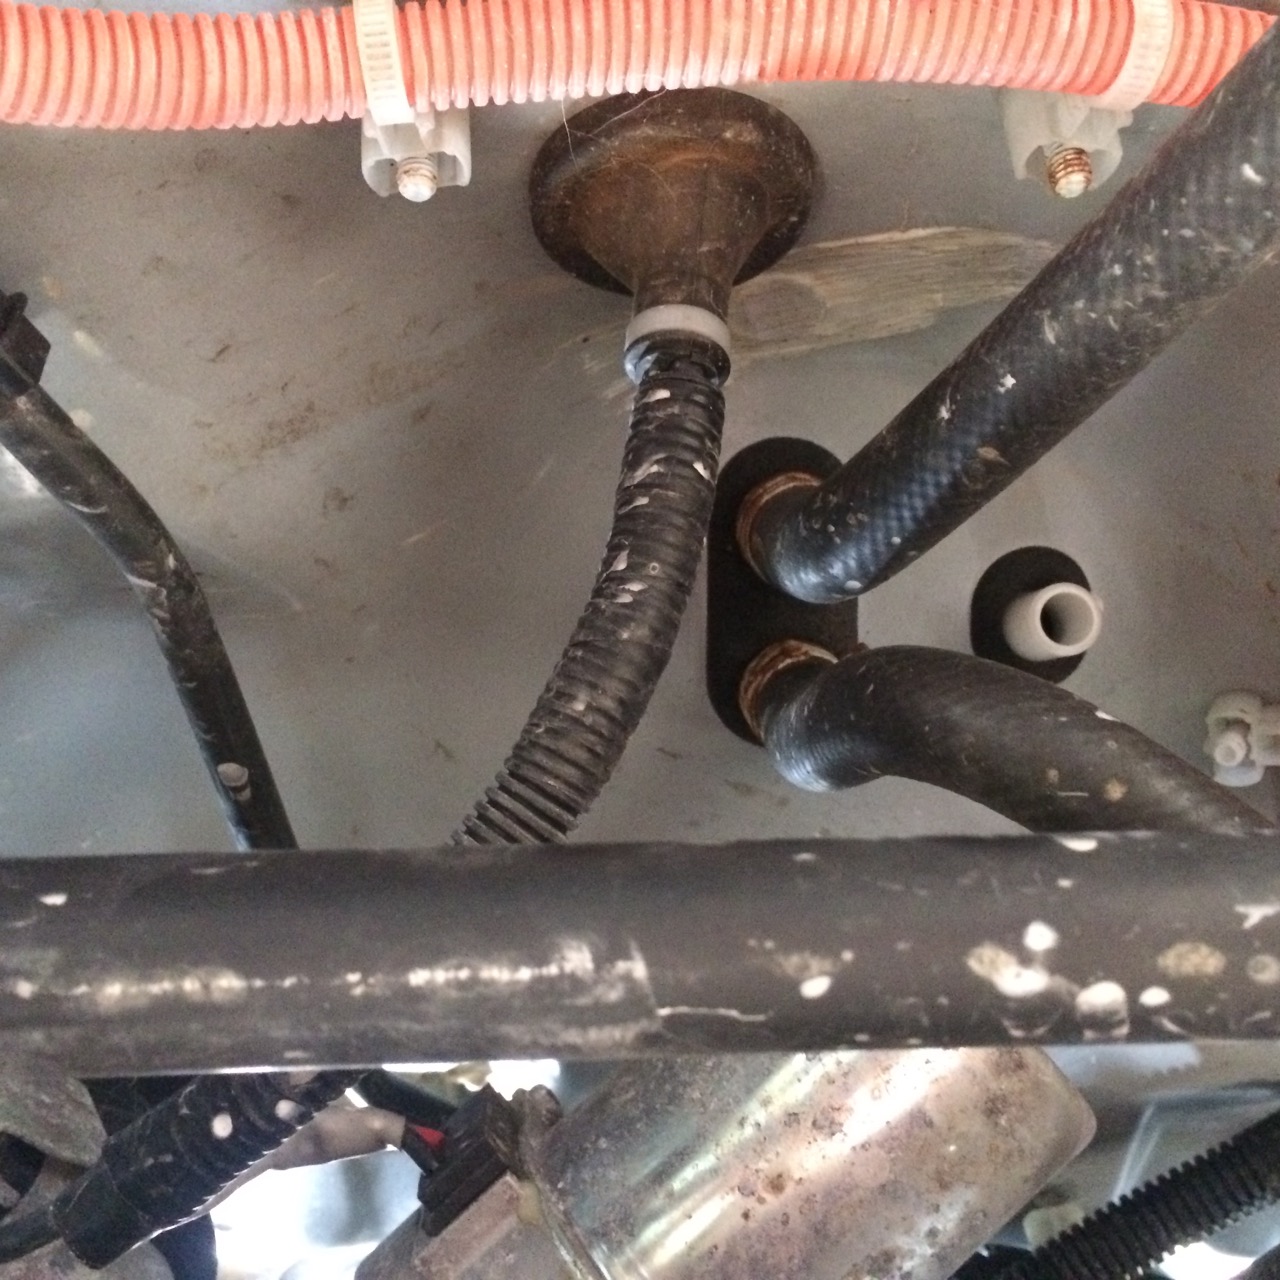
Oddly, although there are all sorts of holes in that white metal plate, I couldn't find anywhere that would line up with any two of the holes in the mounting bracket for the heater. That plate is also almost exactly the same height as the bracket, so there's not much up/down play available. Looked like the best thing to do is is just line up one of the top bracket holes with a hole already in the plate. I did that and temporarily ran a 1/4-20 bolt through it and put a nut on the back. I then set the heater back on the bracket. When I did so, I noticed that the fuel line comes pretty close to the metal rail above the heater. I might want to put a right angle connection on the fuel line there.

IMG_7730-640x480.jpg


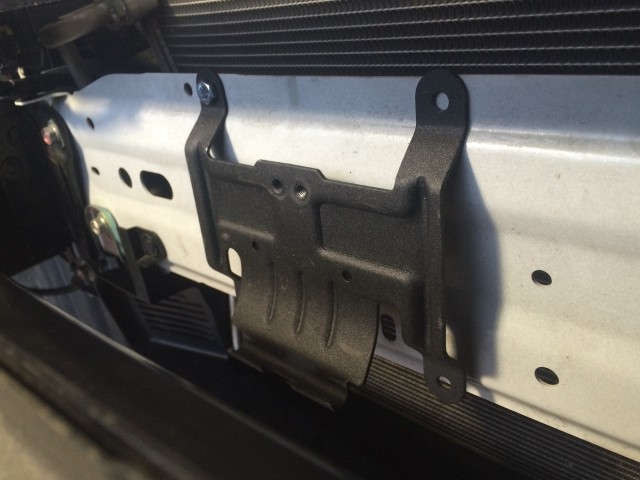
The other super-obvious thing was that there's NO WAY to put through the bolt that connects the heater to permanently hold it in place on the bracket. That means that self-tapping sheet metal screws are out. I'll have to pre-drill holes for bolts, mount the heater to the bracket, then put the bracket and heater in place together and THEN get those little bolts in there to mount the whole thing.

Oh well, at least with the bumper cover off, I can see what I'm doing!
 
Got the muffler installed. The air intake and air filter went directly to the left (passenger side) of the heater.
IMG_7748-640x480.jpg


I mounted the fuel pump between the front plate and the radiator.

I ran the heater hoses through the corner close to the headlight.
IMG_7741-640x480.jpg


I added the one-way tee valve back near/behind the overflow reservoir. This was challenging. It was hard to get the hose off the back of the reservoir tank. Prying with a large flat-blade screwdriver is what actually worked best to get it off. Also, that hose is just SLIGHTLY smaller than the tee and the hose that came with the heater kit. (I think the heater kit hose is 3/4" ID, and the iMiEV hose is 5/8" ID?")
Once I used heat and lubricant, I was able to stretch the original iMiEV hose over the "input" end of the tee and clamp it down. I used a cut off piece of the kit hose to go from the exit of the tee to the back of the coolant reservoir. The hardest part was getting 4 different thick hoses all working together to position the tee and NOT kink the original hose!
IMG_7775-360x480.jpg


After that, I temporarily hooked up the wire harness and fuel bottle so that I could test the system. It worked! Here's a thermal image right after I had ran the parking heater.
IMG_7779.jpg


Next, I need to properly install the wiring harness, including running the cable for the control to the inside, and wiring to the main battery. I need to install the fuel tank. So far, I've just been using a temporary camping fuel bottle with a hole drilled in the cap. I mail ordered a go cart fuel tank. It's only one liter though. I have a feeling I'll want something larger, but this one was inexpensive and will fit under the hood. For the moment, I'll just run the fuel line to the right location while I wait for the fuel tank to arrive in the mail.

After this I can put the bumper cover back on. I'll cross my fingers that everything fits!

Also, it's COLD outside today..... Brrr. Not ideal working conditions...
 
This message is for anyone who has ALREADY installed one of these heaters. WHERE did you run the wire harness for the control panel from under the hood to inside the passenger compartment?

I'm trying not to make too much work for myself. I only saw one big obvious wire harness connection through the firewall. Not sure how easy it is to get to the other side without tearing the entire dashboard apart.

I didn't see wiring of the mini-timer in any of the videos or photos so far.

Descriptions, advice, and photos or videos of where the wiring was run would all be helpful!
Thanks!
 
Hi Ben
I Have a set of pics showing some of the wiring harness that might help you and also a photo of the control mounted on the dash . I coiled the extra wiring harness on top of the front passengers shock tower and will try and get a photo of where I drilled through the fire wall to get it in at the passengers feet under dash location
Link to slide show

http://s211.photobucket.com/user/Sandange/slideshow/miev/Diesel Heater

Dash%20Trim7_zpsdboio59p.jpg
 
Ben, that rubber grommet below the dash in the middle is the only way in/out of the cabin I've found. It's what I've used to bring my heater wiring into the car, among other things. It's not too hard to reach from the inside, actually. If you push a wire through you might even catch it without removing any plastic panels, but you may consider removing them anyway. In the French version the whole "ashtray" in the middle comes off easily, but there should at least be a small piece of plastic on the driver's side (IIRC) that comes off and gives you a good view into that area.
 
Thanks Sandange, I've watched your slideshow like 20 times! It's the best information I've found about doing one of these installations, and I'm installing mine very similarly. It just doesn't show where the cable goes through the firewall! I'd prefer not to drill a hole if I can easily reuse an existing one.

I crawled under the car and found a possible location. In the photo, I am looking straight up in about the middle of the car - driver's side is on the left, and passenger side is on the right. This is just to the right of where the steering goes through the firewall. The two hoses look to be the to and from the heater core.

IMG_7784.jpg


Inside the car, I pulled away part of the plastic in the driver's foot area at that center console and pulled the carpet back a bit. The wires going to that black rubber boot come out right behind the center console. It seems like this would be a good place to pull the parking heater wire through for the mini-timer control unit.

Also in that photo, there's a hose barb with no hose on it to the right of the two hoses. When I was running the heater, there was air coming out of this hole full blast! The air was cold, and I'm pretty sure I was running the heater (not just the blower) at the time. Does anyone know what this is? Is it the exit for warm air being blown into the battery pack? (I have the version of the car with all options on it, so it was heated mirrors, pack heating, CHAdeMO, etc.)

It's another cold day out today. It was 2 degrees F. when I first checked the thermometer. I hope it warms up a bit before I go to work on this some more this afternoon. I've already had my car torn apart for a few days to work on this, and I'd like to be driving it again soon, but I have other things occupying my time as well!
 
Ben, that open port with air coming out is probably the drain for the AC evaporator. Maybe that is one reason why there is so much difference in airflow between heating and cooling. The good thing is that it is behind the heater core, so heat isn't being wasted (except for when the recirculator is on).

The airflow in/out of the battery starts at the floor vents inside the car and ends at the top rear of the pack (where the fan is inside the battery if your flood car had CHAdeMO).
 
Ben, that's the one you got there in the middle of your picture. I've punched a few extra holes into that around the original cable and I've gottent through both the control wires for the heater and a 16mm2 cable for my 12V battery, which is now inside the vehicle, under the rear seat where the tyre fix set used to be.
 
You're almost there Ben
My Hats off to you tackling this in these temperatures.

I'm sure you'll have the timer switch installed in no time
& you'll be driving in a much warmer car soon.

Just wanted to add
If you wired directly onto the battery &
if you have young kids or Grand kids who like to push on all the dash buttons.

In the picture of my dash in front of the shifter, just above the storage bin.
you can see where I installed a second heater saftey switch
(single pole) wired onto the yellow wire in the harness line
just before the heaters timer switch
 
Got most of the work done today!

It started out cold, but the sun finally came out. I was able to work in my garage, in the sun but out of the wind. That, plus a 1000 watt lamp pointed at me (which puts out plenty of RADIANT energy) made for a very cheerful time working.

I was able to run the wiring for the mini-timer into the car through the port down near the steering and radiator hoses into the car. After that, I zip-tied all the wiring harness out of the way.

I decided to insulate the parking heater hoses. I had some "radiant barrier" insulation and cut it into a long strip to wrap around the hoses. I removed the driver's side headlight to make that easier on myself and got them pretty well insulated.

IMG_7806-640x480.jpg


I thought I should try to get a few photos before I put everything back together, so I made sure to take a few. Here's a view from low down looking at the heater and exhaust.

IMG_7820-640x480.jpg


Yea! The bumper cover fit back on! I was a little concerned about the tolerance between the hoses and the cover just to the right of the heater. It all fit!

IMG_7822-640x480.jpg


Here's a view under the hood after the nose was back on and everything was put back together.

IMG_7829-640x480.jpg


I have lots more photos, thoughts, etc. And I have a bunch of video to edit together. I also shot a few thermal videos. I will put together a bunch of that information later as a blog with some work put into it.

For now, I'm just glad to have the heater in the car so I can get back to using the car again! I still need a "real" fuel tank. I mail-ordered one, but it won't be here for a few days. It will probably arrive just after I leave to go out of town for a week....
 
It has been a brutally cold weekend so far. -24 deg C.
My diesel heater stopped working on the highway at 90 km/hr it started ok at home but stopped on the highway I was lucky that I was only going about 30 km round trip and the battery was full. I switched to electric heat to survive. It was incredible how the car just froze up on the highway without heat. Anyways I think the fuel line froze perhaps a little water in the fuel it started working after letting the car thaw in the garage for a couple of hours.

I'm really glad it's back online.

Don...
 
I started editing together some of the video. It's pretty long, at least half an hour in total, so I'm breaking it up into sections.

Here's Part 1.
https://www.youtube.com/watch?v=3RHiDYGPZlY

and Part 2.
https://www.youtube.com/watch?v=2zJFowv8fuQ

Also today, I got my little tiny fuel tank in the mail. It's only one liter, but has a real cap and dedicated hose barb on the bottom. I installed it and it seems to work pretty well - looks good and I can put fuel in it without having to remove it.

IMG_7841-640x480.jpg
 
I switched to electric heat to survive. It was incredible how the car just froze up on the highway without heat. Anyways I think the fuel line froze perhaps a little water in the fuel it started working after letting the car thaw in the garage for a couple of hours.

Are you sure that it was frozen water in the fuel line and not in the heater? If it was frozen water in the heater, then maybe the temperature fell below the operating limits of the heater. That could be a real problem.
 
I just took a look at the instruction manual for the heater. On page 25 of the manual, it lists all the possible error fault codes. There are a number of errors about coolant temperature, flame sensor temperature, and other temperatures being too HIGH, but I didn't see ANY about any temperatures being too low. I don't see why this heater shouldn't operate in extreme cold. It's a pretty simple device - only a few moving parts.

There are issues with certain fuels and extreme cold. I know that E85 and Ethanol have cold start issues (but that's really a spark-plug thing...) Diesel is much THICKER when cold, which may make a fuel pump work extra hard. The fuel line going to this heater is TINY. It's easy to imagine almost anything plugging it up, even frost in air that may have worked it's way inside.
 
Around these parts the diesel fuel changes based on time of year. Summer quality diesel starts to clog up at -5˚. Winter quality is good until about -29˚C. If you don't have winter quality diesel available at your location then it's quite possible that what you have experienced is the diesel fuel becoming too thick to move. Another point for ethanol. ;)
 
Here's Part 3 of the installation video.
https://www.youtube.com/watch?v=ZBrasUFSx2E

And Part 4.
https://www.youtube.com/watch?v=LxBI7YtXd_U

Part 5.
https://www.youtube.com/watch?v=rcPIHZE3mn0
 
Wow Ben
Great videos!!
:D
Clearly showing all the hard to see locations and a well explained step by step installation.
A super guide to any one wanting to do this installation.
Well Done!
 
Thank you!
The whole thing is a bit long, and I might repeat myself a bit, but I wanted to document it well enough for other people to more easily do a similar installation.

Looking back at it, I wish I would have remembered to take more STILL PHOTOS as well!

Here's part 6, which is mostly installing the little fuel tank.

https://youtu.be/Duif55IDpi4
 
Back
Top